I wanted to wait until my machine arrives to try out the attachments, but anticipation got the better of me and I got my mother in law's FW out and tried hers (that way when mine arrives, I figure I'll be ready!).
 |
| Ruffler |
My first endeavor was The Ruffler. An ingenious little piece of machinery really, when you stop to look at the mechanism; Powered by the motion of the needle and using a set of small gears. I tried the 1 stitch ruffle, 6 stitch ruffle and the 12 stitch ruffle all with little effort and great success. It's very easy to use and the results are very nice.
 |
| Bias Binder |
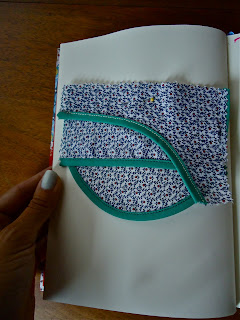
Next came The Bias Binder. I began with a very wide (maybe an inch or inch and a half?) piece of pre-made bias tape which I chose because I got the wrong size awhile ago and have no current use for it. I had a hell of a time getting it into the little cone (which probably should have been a warning) and when I finally got it through the cone and in position to sew, it wouldn't budge. After fiddling around with it a bit, it was still holding its ground so I pulled it out with some difficulty and went in search of some 1/2" pre-made bias tape. The 1/2" threaded quite easily into the cone and in a matter of moments I was binding everything - concave & convex curves included - in sight. Remarkable.
The only thing that is a bit tricky with this foot is keeping the thread in the right spot so that it doesn't slip off the tape or wander lazily across it. This is something I assume just a little more practice will cure since the fabric and tape, once in position, pretty much take care of themselves leaving my attention free to make sure the needle is on point.
 |
| Narrow Hem Foot |
Finally, The Narrow Hem Foot. I watched a tutorial about this foot earlier today and when I saw it in the box I decided to try it out. Wow it makes a narrow hem! I did not iron or do anything to the fabric before sticking it in there and sewing but I found that if I make a narrow hem, then make another narrow hem (to encase the raw edge) the result is...well very neat and narrow. This foot is a little tricky to use because there's like a..swirl..in the middle that requires some watching to make sure it isn't taking too much or too little fabric but I think with a little more use it will become much easier. Overall, a success.
What I love ab the Singer FW is that all the components are so functional. The different presser feet and attachments require a little attention (especially at first) but for the most part they do what they're supposed to do with little to no effort on the part of the seamstress. They make sewing quite a bit faster and easier with such lovely, polished results. I'm so happy that I will have one of my own soon. I am also extremely excited to begin making buttonholes!
Sewing Tip of the Day: When threading the machine, make sure the presser foot is in the UP position. This allows the tension disks to slacken so that the thread will reach the core when guided through. If the presser foot is in the DOWN position the tension disks will engage which will prevent the thread from reaching the core and will cause stitches to be uneven.


